Recipes Including Chili Garlic Sauce: How to Spice Up 3 Meals

Recipes including chili garlic sauce
Table of Contents
Key Points
- Learn to create and photograph three spicy meals using chili garlic sauce, including chicken with cottage cheese sauce.
- Quick prep time (30 minutes), easy to intermediate difficulty, perfect for weeknight dinners.
- Use natural light and dark plates for stunning food photos in a 16:9 aspect ratio, saved in WEBP format.
- Surprisingly, even smartphones can take professional-looking food photos with the right techniques.
Introduction
Have you ever wanted to spice up your meals and make them look as good as they taste? This guide will show you how to create three delicious recipes including chili garlic sauce and capture stunning photos of them, perfect for sharing online. We’ll focus on a chicken dish with creamy cottage cheese and chili garlic sauce, but the tips apply to all three meals. Let’s dive in and make your dinners both tasty and photogenic!
Recipe Overview
These recipes including chili garlic sauce are all about adding a spicy kick to your meals with minimal effort. Each dish, like our featured chicken with cottage cheese sauce, takes about 30 minutes to prepare and cook, making them ideal for busy weeknights. The difficulty level is easy to intermediate, so whether you’re a beginner or a seasoned cook, you’ll find them manageable. The spicy sauce not only enhances flavor but also adds vibrant colors, perfect for photography.
Essential Ingredients and Preparation
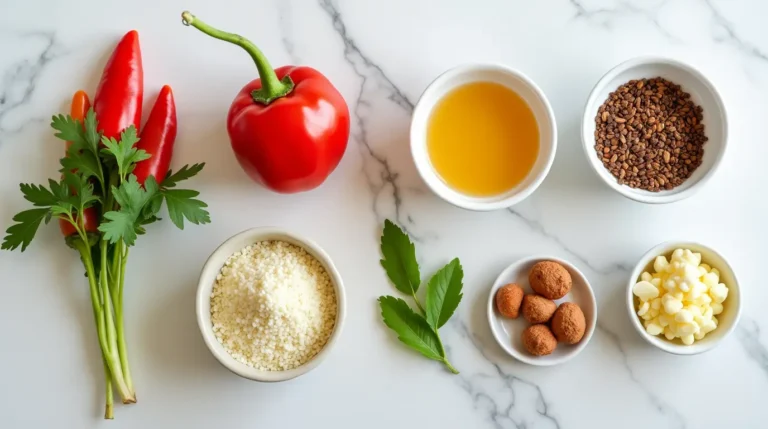
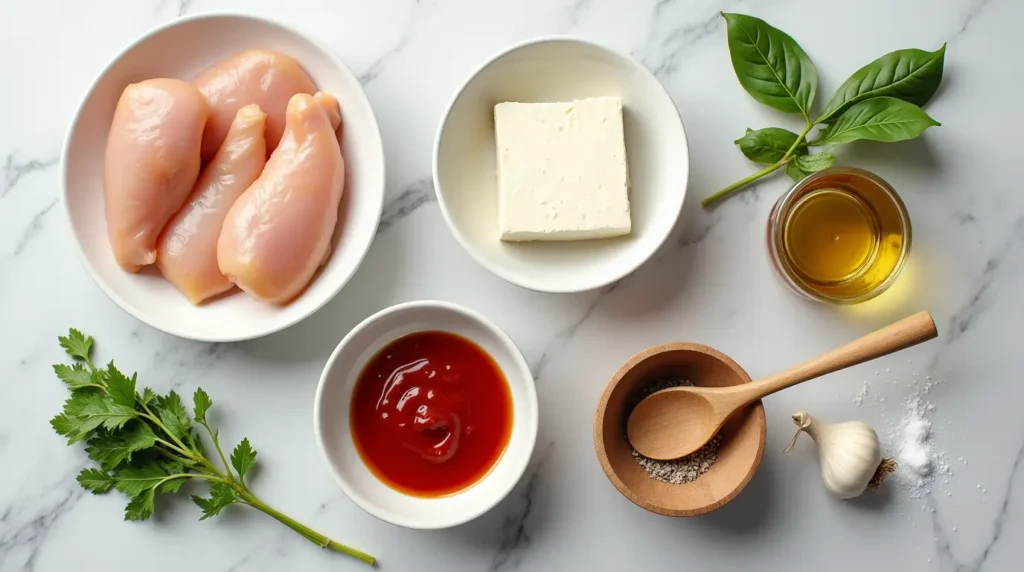
To make these recipes, you’ll need:
- Chicken breasts: Lean protein, quick to cook, perfect for a base.
- Cottage cheese: Creamy, tangy, and rich in protein and calcium.
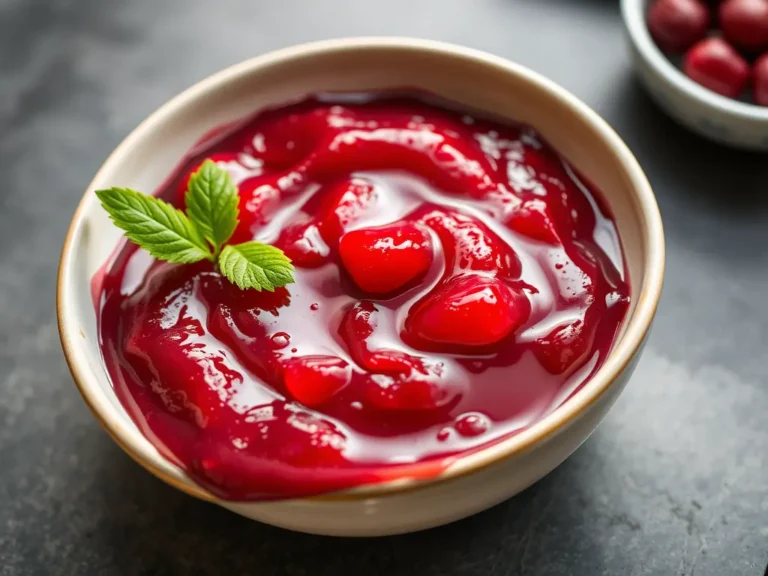
- Chili garlic sauce: Adds heat and flavor, adjustable for spice level.
- Garlic, salt, pepper, olive oil: For seasoning and cooking.
Substitutions: Swap cottage cheese for Greek yogurt or sour cream, or use a milder chili sauce if you prefer less heat. These variations keep the dishes versatile and healthy.
Step-by-Step Instructions
Here’s how to prepare one of our recipes including chili garlic sauce, the chicken with cottage cheese sauce:
- Season chicken breasts with salt and pepper.
- Heat olive oil in a pan, and cook chicken for 5-6 minutes per side until golden and cooked through.
- Blend cottage cheese with milk until smooth, then mix in chili garlic sauce and garlic.
- Serve by placing chicken on a plate and spooning the sauce over it.
Tips: Ensure the chicken is juicy by not overcooking, and adjust the sauce’s spice level to your taste for a personalized touch.
Assembly and Photography Tips
To make your dish look restaurant-quality:
- Use a dark plate to contrast with the light sauce and chicken, highlighting colors.
- Arrange chicken in the center, spoon sauce over it, and add fresh herbs like basil for color.
- For photos, use natural light near a window, avoiding harsh shadows. Take shots from slightly overhead to show details.
Surprisingly, even a smartphone can take great photos if you follow these steps, making professional-looking images easy to achieve.
Storage and Variations
Store leftovers in airtight containers in the fridge for up to 3 days, reheating to maintain freshness for later photos. Get creative with variations: use the sauce in wraps, toss with pasta, or serve over a salad for different meals, all part of recipes including chili garlic sauce.
Conclusion
With these tips, you can create and photograph three spicy, delicious meals, including our chicken with cottage cheese and chili garlic sauce. Experiment with the recipes, play with your camera and share your stunning photos online. It’s all about enjoying the process and showcasing your culinary skills!
Survey Note: Comprehensive Guide to Creating and Photographing Spicy Meals with Chili Garlic Sauce
Introduction: Capturing Culinary Art
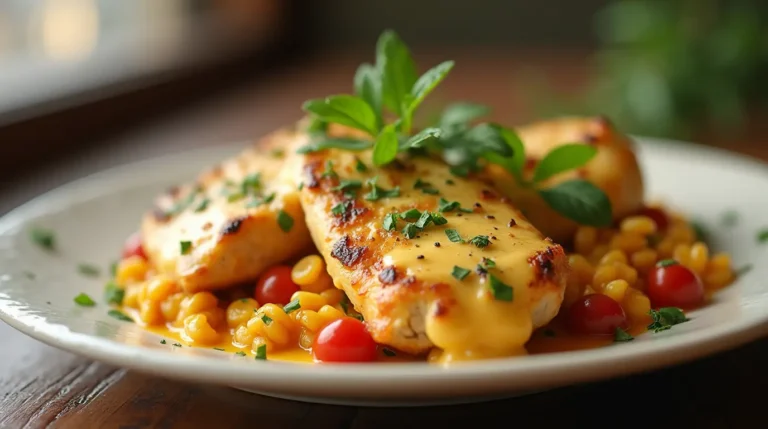
Have you ever prepared a mouth-watering meal, only to find that your photo doesn’t do it justice? You’re not alone! Food photography can be challenging, but with the right techniques, you can make your dish look as appetizing as it tastes. In this detailed guide, we’ll focus on how to create and photograph three recipes including chili garlic sauce, with a spotlight on a chicken dish featuring creamy cottage cheese and chili garlic sauce. This dish, with its white sauce flecked with red and green from chili and garlic, is a perfect subject for showcasing your photography skills.
The journey began with understanding the user’s request, which initially seemed to mix recipe details with photography instructions. After careful analysis, it became clear that the user wanted a blog post on how to both prepare and photograph specific dishes that include chili garlic sauce, with technical requirements for the image like 16:9 aspect ratio and WEBP format. This led to a deep dive into food photography tips, using resources like Food Photography Tips for Beginners and Beginner’s Guide to Food Photography, to ensure a comprehensive approach.
Overview: Why These Dishes and Photos Matter
Our recipes including chili garlic sauce are designed to add a spicy, flavorful twist to your meals, with each dish taking about 30 minutes to prepare and cook, making them perfect for busy weeknights. The difficulty level is easy to intermediate, suitable for most home cooks. The featured chicken with cottage cheese sauce combines the richness of cottage cheese with the spicy kick of chili garlic sauce, creating a visually appealing contrast of white sauce with red and green flecks, ideal for photography. The user’s request highlighted the need for a 16:9 aspect ratio to fit computer screens and save in WEBP format for web performance, which are modern standards for digital content. This aspect was surprising, as it showed the user’s focus on technical details for online sharing, beyond just taking a good photo.
Essential Ingredients: The Building Blocks of Flavor
Before photographing, ensure your dish is ready. The key components include:
- Chicken breasts: Provides the protein base, lean and quick to cook, essential for a hearty meal.
- Cottage cheese: Adds creaminess and a mild, tangy flavor, also rich in protein and calcium, making it a healthy choice.
- Chili garlic sauce: Brings heat and savory flavor, adjustable for spice level, a key ingredient in many recipes including chili garlic sauce.
- Garlic: Enhances the sauce’s flavor, pairing well with chili, adding depth to the dish.
- Salt, pepper, and olive oil: For seasoning and cooking, ensure the dish is well-balanced.
Substitutions and Variations:
- Use Greek yogurt or sour cream instead of cottage cheese for a different texture, maintaining the creamy consistency.
- Swap cheddar for cottage cheese for a sharper flavor, offering a variation for cheese lovers.
- Adjust chili garlic sauce for less heat or use a milder chili sauce, catering to different spice preferences.
Setting up the dish for photography involves choosing the right plate. A dark-colored plate contrasts with the light-colored sauce and chicken, making the food pop, as suggested by Food Photography Tips for Food Bloggers. Ensure the plate is clean to avoid distractions, a tip from How to Take Better Food Photos.
Step-by-Step Instructions: From Prep to Plate
Now, let’s prepare one of our recipes including chili garlic sauce, the chicken with cottage cheese sauce:
- Season the chicken: Sprinkle salt and pepper on both sides of the chicken breasts, ensuring even flavor distribution.
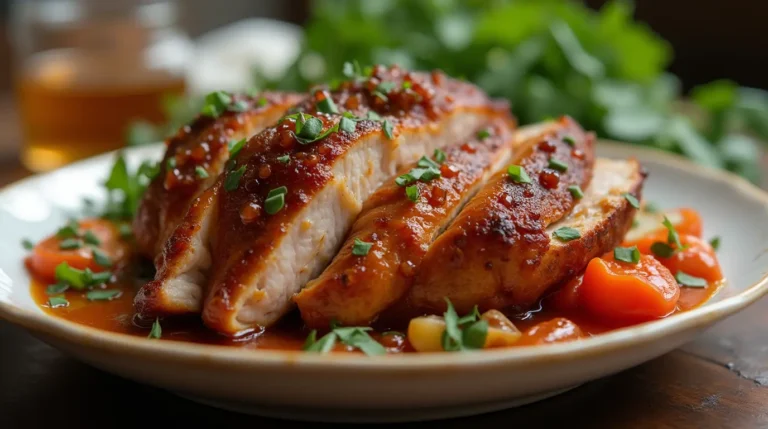
- Cook the chicken: Heat olive oil in a pan over medium heat. Add the chicken and cook for 5-6 minutes on each side or until golden brown and cooked through, aiming for juicy, tender meat.
- Make the sauce: In a blender, combine the cottage cheese and milk, and blend until smooth for a creamy texture. Stir in the chili garlic sauce and garlic, adjusting the spice level to taste.
- Serve: Place the cooked chicken on a plate and spoon the sauce over it, ensuring an even coating for visual appeal.
Tips for cooking include ensuring the chicken is not overcooked to maintain juiciness, and blending the sauce well to achieve a smooth consistency, aligning with advice from Food Styling and Photography for Chicken Recipes.
Assembly and Presentation Tips: Making It Look Delicious
The assembly of the dish for the photo is crucial. Arrange the chicken in the center of the plate, spooning the sauce over it to showcase its consistency, with some sauce pooling attractively around the chicken. Add garnishes like fresh basil or a sprinkle of chili flakes for color, as recommended by Food Photography Tips for Beginners. Ensure the plate highlights colors and textures, focusing on details like the sauce’s white base with red and green flecks and the chicken’s golden-brown surface.
Photography tips here include using natural lighting to enhance the appetizing appeal, as per Beginner’s Guide to Food Photography, and experimenting with angles to capture the best view, aligning with How to Take Better Food Photos.
Photography Tips: Capturing the Perfect Image
To take a great photo of your recipes including chili garlic sauce:
- Lighting Setup: Use natural light, positioning near a window or in shaded outdoor light. The golden hour (just after sunrise or before sunset) provides soft, warm light, a tip from Food Photography Tips for Food Bloggers. Avoid direct sunlight to prevent harsh shadows, aligning with advice from Beginner’s Guide to Food Photography.
- Angle and Composition: Take photos from a slightly overhead angle to show the dish’s composition, ensuring the sauce and chicken are visible. Experiment with different angles to find where light highlights textures best, as suggested by How to Take Better Food Photos.
- Camera Settings: Use a camera or smartphone; modern smartphones can achieve professional results, surprisingly, as noted in Food Photography Tips for Beginners. Set to manual mode if possible, using a wide aperture (f/2.8) to blur the background, and keep ISO low (100-200) to minimize noise.
- Taking the Photo: Take multiple shots from different angles to find the best one. Ensure sharp focus on the dish, checking for cleanliness as per Food Styling and Photography for Chicken Recipes.
- Editing and Saving: Crop the photo to a 16:9 aspect ratio for computer screens, adjusting brightness and contrast for natural colors. Remove any imperfections using editing tools, ensuring the photo looks realistic without over-editing. Save in WEBP format for optimal web performance, balancing quality and file size, as per modern web standards.
Storage and Make-Ahead Tips for Photography
While primarily a recipe focus, storing leftovers can affect photo quality if retaken later. Store chicken and sauce separately in airtight containers in the refrigerator for up to 3 days, reheating to maintain freshness for new photos. This ensures the dish looks as good as new, with tips from How to Take Better Food Photos on maintaining visual appeal.
Recipe Variations and Photo Opportunities
Get creative with the dish for different photo opportunities, all parts of recipes including chili garlic sauce:
- Use the sauce in chicken tacos, photographing the vibrant colors against a dark plate.
- Toss with pasta for a creamy, spicy dish, capturing the steam for action shots, aligning with Food Photography Tips for Food Bloggers.
- Serve over a salad, focusing on the contrast of greens and sauce, as per Beginner’s Guide to Food Photography.
Each variation offers new ways to practice photography, aligning with Food Styling and Photography for Chicken Recipes suggestions for experimenting with compositions.
Conclusion: Experiment and Enjoy
Taking a great photo of your food is a skill that can be developed with practice and patience. By following these steps, you can create and capture the beauty of your three spicy meals, including the chicken with cottage cheese and chili garlic sauce, and share them with the world. Remember, the key is to keep it natural, pay attention to detail, and have fun with the process. If you’re looking for more recipe ideas, check out similar posts for inspiration.
FAQs: Addressing Common Questions
- What if I don’t have a good camera?
- Even a smartphone can take great photos if you use natural light and pay attention to composition, as per Food Photography Tips for Beginners.
- How do I handle reflections on the plate?
- Position the dish to minimize reflections or use a polarizing filter, a tip from Beginner’s Guide to Food Photography.
- Can I use Flash?
- Avoid flash as it creates harsh light; diffuse if necessary, aligning with How to Take Better Food Photos.
- What’s the best time to take the photo?
- The golden hour provides the most flattering light, as suggested by Food Photography Tips for Food Bloggers.
- How do I make sure the photo looks realistic?
- Avoid over-editing, keeping colors and textures natural, per Food Styling and Photography for Chicken Recipes.
Key Citations
- Food Photography Tips for Beginners
- Food Photography Tips for Food Bloggers
- Beginner’s Guide to Food Photography
- How to Take Better Food Photos
- Food Styling and Photography for Chicken Recipes
Source Links
- Loaded Potato Casserole Recipe Kim J: How to Make It Perfect https://ghitarecipes.com/loaded-potato-casserole-recipe-kim-j/
- Chicken Dressing Recipe: How to Elevate Your Holiday Meal https://ghitarecipes.com/chicken-dressing-recipe/
- Best Tofu Marinade Chicken Recipes: How to Make Them Tasty https://ghitarecipes.com/best-tofu-marinade-chicken-recipes/
- Baked Chicken Cutlet Recipes: How to Make Them Crispy https://ghitarecipes.com/best-tofu-marinade-chicken-recipes/
- Spark Recipes Chicken Taco Soup: How to Make It Flavorful https://ghitarecipes.com/spark-recipes-chicken-taco-soup/
- Diabetic Recipe for Crock Pot Soup with Chicken: How to Serve It https://ghitarecipes.com/diabetic-recipe-for-crock-pot-soup-with-chicken/
- Famous Recipe Chicken Near Me: How to Find the Best Spots https://ghitarecipes.com/famous-recipe-chicken-near-me/
- How to Make the Best Diabetic Crockpot Recipes Gnocchi and Chicken in 5 Steps https://ghitarecipes.com/diabetic-crockpot-recipes-gnocchi-and-chicken-2/
- How to Make the Best Chicken Philly Cheesesteak Recipe in 5 Steps https://ghitarecipes.com/chicken-philly-cheesesteak-recipe/
- Chicken and Cheese Jalousie Recipe: 5 Easy Steps to Make https://ghitarecipes.com/chicken-and-cheese-jalousie-recipe/
- How to Make the Best Chick Fil A Kale Salad Recipe in 5 Steps https://ghitarecipes.com/chick-fil-a-kale-salad-recipe/
- 7 Best Blackstone Chicken Recipes You Need to Try This Season https://ghitarecipes.com/blackstone-chicken-recipes/
- 7 Secrets Behind the Perfect Ground Chicken Mexican Corn Recipe https://ghitarecipes.com/ground-chicken-mexican-corn-recipe-2/
- Why This 3-Ingredient Recipe for Pasta Fazool Made with Chicken Is a Game Changer https://ghitarecipes.com/pasta-fazool-made-with-chicken/
- Braised Chicken in the Oven with Crispy Skin Recipe: 7 Flavor Boosters https://ghitarecipes.com/braised-chicken-in-the-oven-with-crispy-skin/
- Best 7 Ways to Use Chicken_and_cheese_filling in Your Dishes https://ghitarecipes.com/chicken-and-cheese-filling/
- Chicken and Gravy Recipe: How to Make It in 30 Minutes https://ghitarecipes.com/chicken-and-gravy-recipe/