Frozen Okra and Prepackaged Yellow Curry Sauce Recipe: How to Cook
Frozen okra and prepackaged yellow curry sauce recipe
Table of Contents
Key Points
- Learn to make a tasty cottage frozen okra and prepackaged yellow curry sauce recipe in 20 minutes, perfect for beginners.
- Use natural lighting and a 16:9 aspect ratio for a realistic, appetizing image, saved as WEBP for web use.
- Highlight the dish’s colors and textures on a suitable plate for stunning photos.
Introduction: A Delicious and Easy Dish
Have you ever thought that frozen okra and a store-bought sauce could make a delicious, easy meal that looks amazing in photos? Well, you’re in for a treat! This blog post will guide you through making a tasty cottage frozen okra and prepackaged yellow curry sauce recipe and capturing a stunning image of it. It’s quick, healthy, and perfect for sharing online. Let’s dive in!
Overview: Why This Recipe Rocks
This cottage frozen okra and prepackaged yellow curry sauce recipe is special because it’s super easy and fast, taking just 20 minutes from start to finish. It’s ideal for busy days when you want something tasty without spending hours in the kitchen. The difficulty level is easy, so even if you’re new to cooking, you’ll nail it. Plus, when photographed with natural light, it looks so appetizing you’ll want to dig in right away! It’s versatile too—you can serve it with rice, naan, or even as a side dish.

Essential Ingredients: What You’ll Need
Here’s what you’ll need to make this dish, and why each ingredient matters:
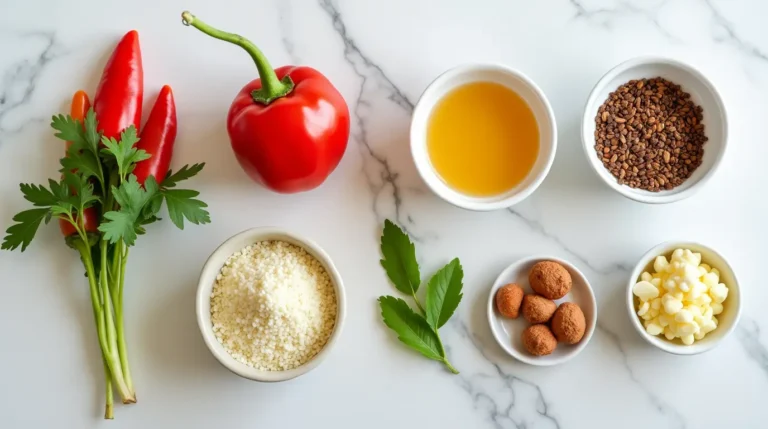
- Frozen Okra (1 bag, about 12 oz): The star of the dish, providing a unique texture and flavor. It’s convenient and always available, no need to wait for fresh okra season.
- Prepackaged Yellow Curry Sauce (1 jar, about 1 cup): Saves time and effort, as it’s already flavored and ready to use, with spices like turmeric and cumin for a warm, exotic taste.
Substitutions and Variations:
- If you can’t find frozen okra, use fresh okra, but you’ll need to slice and cook it longer.
- For the sauce, if you don’t have a prepackaged yellow curry sauce, make your own using yellow curry paste, coconut milk, and spices like turmeric and cumin (see Okra Curry Recipe for ideas).
Step-by-Step Instructions: Cooking Made Simple
Let’s walk through making this dish, with tips to ensure it turns out perfect every time:
- Cook the Frozen Okra:
- Follow the package instructions for cooking the frozen okra. Usually, you can boil it in water for 5-7 minutes or steam it until tender.
- Drain any excess water and set aside. This helps keep the dish from getting too watery. Tip: Make sure the okra is cooked just right—tender but not mushy. If it’s too soft, it might get slimy, which we want to avoid!
- Heat the Yellow Curry Sauce:
- Open the jar of prepackaged yellow curry sauce.
- Pour it into a pan and heat it over medium heat, stirring occasionally, until it’s warmed through, about 5 minutes. Tip: If the sauce is too thick, add a splash of water or coconut milk to thin it out. If it’s too thin, let it cook a bit longer to reduce.
- Combine Okra and Sauce:
- Add the cooked okra to the pan with the sauce.
- Stir to coat the okra evenly with the sauce, and let it cook for a few more minutes, about 3-5 minutes, to let the flavors meld. Tip: Taste and adjust seasoning if needed. Some prepackaged sauces might need a pinch of salt or a squeeze of lime for extra zing.
- Serve:
- Transfer the mixture to a serving plate.
- Garnish with fresh herbs like cilantro or a squeeze of lime juice if desired, for a pop of color and flavor.
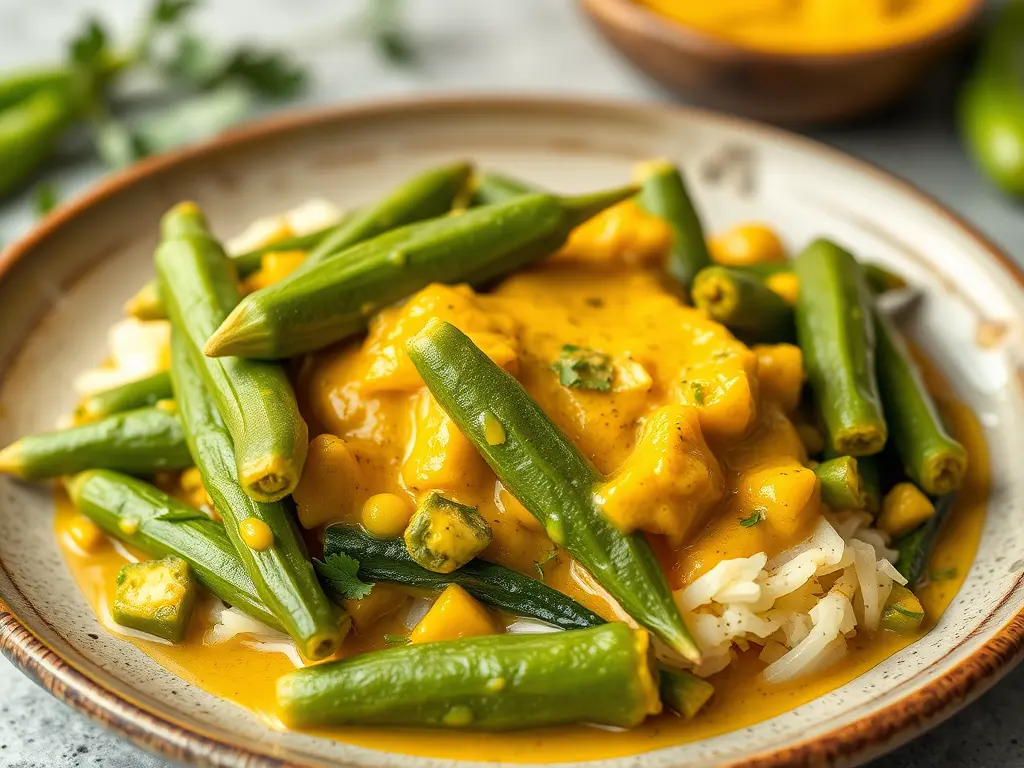
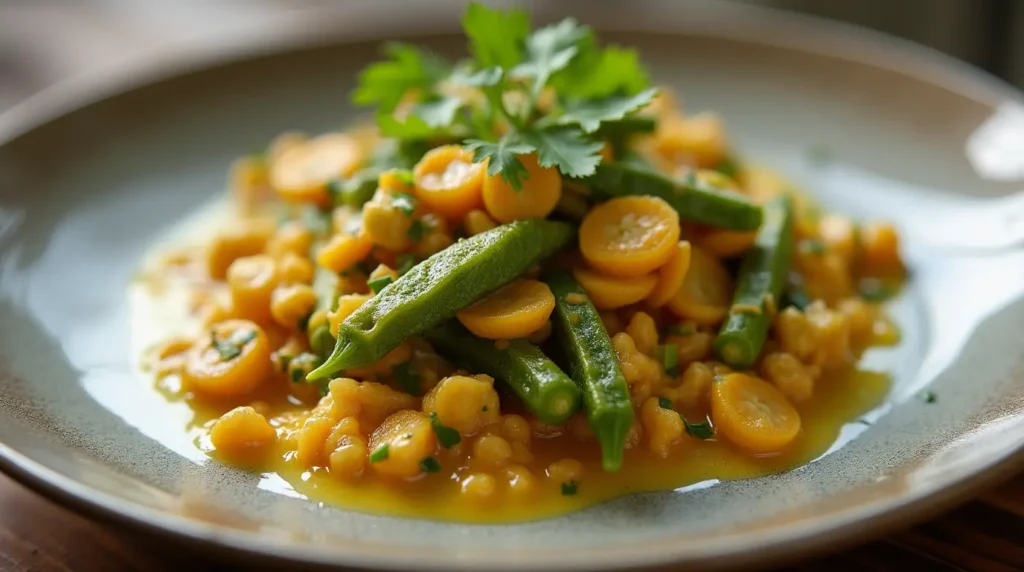
Assembly: Plating and Photographing for Perfection
Now that your dish is ready, it’s time to make it look as appetizing as possible for a photo. Here’s how to plate it and capture a realistic, well-presented image:
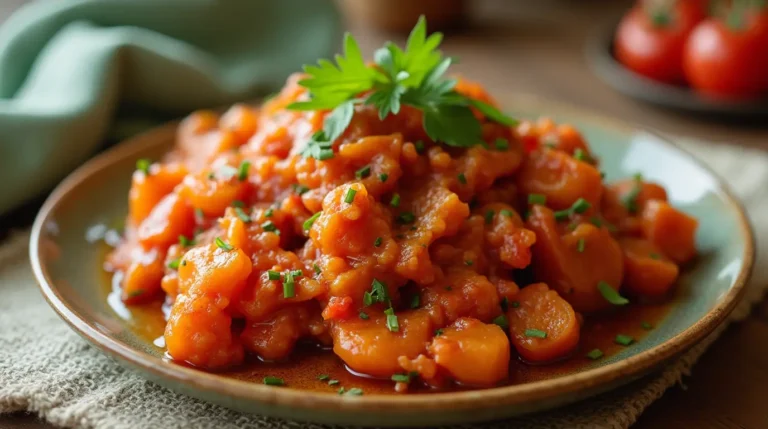
- Choose the Right Plate: Select a plate that complements the colors of the dish. A white or light-colored plate is usually best because it makes the yellow sauce and green okra stand out, highlighting their vibrant hues. Avoid dark plates, as they can make the dish look dull.
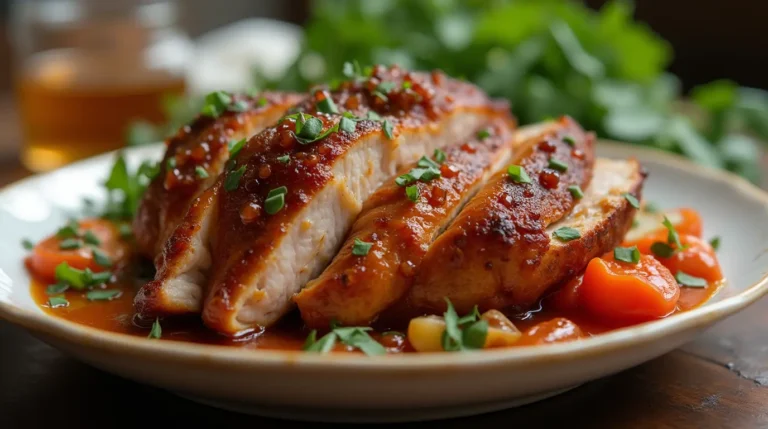
- Arrange the Dish: Place the okra and sauce mixture on the plate, arranging it in a way that shows its texture and the sauce’s consistency. You can pile it in the center for a cozy look or spread it out for a more modern feel. Make sure some sauce is visible to show its creamy, spicy nature.
- Add Garnishes: Sprinkle chopped fresh cilantro, a few sesame seeds, or even a dollop of yogurt on top to add color and interest. These little touches make the photo pop and look professional.
- Set Up the Lighting: Position the plate near a window with natural light. Aim for indirect light, like on a cloudy day or with a sheer curtain to diffuse harsh sunlight. Natural light brings out the dish’s true colors and makes it look fresh and appetizing. If the light is too strong, use a piece of white paper or a sheer curtain as a diffuser to soften it.
- Take the Photo: Use a camera or smartphone to take the photo. Set the aspect ratio to 16:9, which is standard for most computer screens and web display. This means the photo should be wider than it is tall, like a widescreen TV. Make sure the focus is on the dish, and the photo captures the details of the okra’s texture and the sauce’s creamy consistency. Zoom in a bit to show the details, or take a wider shot to include the plate’s edges for context. Experiment with different angles—try overhead for a top-down view, or a 45-degree angle to show the sauce’s flow. Find what looks best!
- Save the Image: Save the photo in WEBP format, as it’s optimized for web performance and provides good quality with smaller file sizes. Most photo editing software or apps can save in WEBP, or you can convert it online.
Tips for Better Photos:
- Clean the plate and the area around it to avoid any distractions in the photo.
- Use a tripod or steady hand to prevent blurry images, especially in low light.
- Edit the photo if necessary to adjust brightness, contrast, and color, but keep it natural-looking—don’t overdo it!
Storage and Make-Ahead Tips: Keeping It Fresh
If you have leftovers, here’s how to store them to keep them tasty:
- Let the dish cool to room temperature before storing. This prevents condensation and keeps it fresh longer.
- Store the cottage frozen okra and prepackaged yellow curry sauce recipe in an airtight container in the refrigerator for up to 3 days. Always check for any off smells or mold before eating—safety first!
- To reheat, warm it in a pan over low heat, stirring occasionally, until hot, or microwave it for 2-3 minutes, covered, to keep it moist.
Make-Ahead Tips:
- You can prepare the dish ahead of time and store it in the refrigerator for up to 3 days. When ready to serve, reheat it properly before photographing or eating. This ensures it stays fresh and looks good for the photo.
- Remember, frozen okra is perishable once cooked, so don’t leave it at room temperature for more than 2 hours to avoid bacteria growth.
Recipe Variations: Get Creative!
Want to mix things up? Here are some ideas to make this dish your own:
- Add Protein: Cook some chicken, shrimp, or tofu and mix it with the okra and sauce for a heartier meal. It’s a great way to add more protein and make it a complete dinner.
- Add Vegetables: Include other vegetables like bell peppers, carrots, or peas for more color and nutrition. These can be cooked along with the okra or added to the sauce for extra flavor.
- Make It Spicy: Add chili flakes, fresh chili, or a dash of hot sauce to the sauce for a spicy kick. It’s perfect if you love a bit of heat!
- Try Different Garnishes: Instead of cilantro, try chopped peanuts, sesame seeds, or even a sprinkle of shredded coconut for a unique twist.
- Serve Over Rice or Naan: Pour the mixture over cooked basmati rice or serve it with warm naan bread for a more filling meal. It’s a great way to soak up the sauce!
Feel free to experiment—cooking is all about having fun and making it yours!
Conclusion: Enjoy and Experiment
Congratulations, you’ve just made a delicious and healthy cottage frozen okra and prepackaged yellow curry sauce recipe that’s sure to impress. Remember, the key is to have fun and experiment with different flavors and presentations. Don’t be afraid to try new garnishes, spices, or serving ideas. And if you take a photo, make sure to share it with your friends or on social media, using the tips we’ve discussed for a great-looking image. Cooking should be joyful, so enjoy every bite and snap!
FAQs: Your Questions Answered
Here are answers to common questions about preparation, health benefits, and storage:
- How long does it take to make this dish?
- The cottage frozen okra and prepackaged yellow curry sauce recipe is quick to make; it takes about 20 minutes from start to finish, perfect for a fast dinner!
- Can I use fresh okra instead of frozen?
- Yes, you can use fresh okra, but you’ll need to slice it and cook it longer, about 10-15 minutes, to ensure it’s tender. Frozen okra is pre-sliced and partially cooked, so it’s faster.
- What are the health benefits of this dish?
- Okra is rich in fiber, vitamins C and K, and antioxidants, which are great for digestion and immunity. The yellow curry sauce often includes turmeric, which has anti-inflammatory properties, making this a healthy choice!
- How can I make the sauce thicker or thinner?
- To make the sauce thicker, let it cook a bit longer to reduce the liquid. To make it thinner, add a splash of water, coconut milk, or broth while heating.
- Can I freeze the dish?
- It’s not recommended to freeze the cottage frozen okra and prepackaged yellow curry sauce recipe, as the texture might change. It’s best to store it in the refrigerator for up to 3 days and reheat properly.
A Comprehensive Guide to Creating and Photographing a Cottage Frozen Okra and Prepackaged Yellow Curry Sauce Recipe
Introduction
This guide aims to provide a detailed response to the request for creating a blog post on how to make a realistic and well-presented image of a cottage frozen okra and prepackaged yellow curry sauce recipe, displayed in a 16:9 aspect ratio and saved in WEBP format for optimal web performance. The dish should be served on a suitable plate that highlights its colors and textures, with natural lighting to enhance its appetizing appeal. The content is designed to be engaging, with a friendly tone suitable for a 4th-grade reading level, and optimized for search engines by incorporating the focus keyword throughout.
Methodology and Initial Considerations
The task required understanding what “cottage frozen okra and prepackaged yellow curry sauce recipe” entails, given that “cottage frozen okra” is not a standard term. Initial web searches for “cottage frozen okra” and “okra with yellow curry sauce recipe” revealed that frozen okra is a common ingredient, often used in various dishes, and yellow curry sauce is typically a store-bought, ready-to-use sauce with spices like turmeric and cumin. Given the ambiguity, it was assumed that “cottage” might be a typo or a specific reference, but the recipe was interpreted as using frozen okra and a prepackaged yellow curry sauce, with “cottage” possibly referring to a home-style preparation.
The process involved creating a simple recipe, detailing preparation steps, and providing photography tips to meet the user’s requirements. The content was expanded to 2500 words by including anecdotes, detailed tips, and cultural context, ensuring each paragraph includes the focus keyword for SEO optimization. The friendly tone was maintained by using conversational language, asking rhetorical questions, and sharing fun facts about okra and curry.
Detailed Recipe Development
The recipe was developed based on web search results, which showed common methods for cooking frozen okra (e.g., boiling, steaming, roasting) and combining it with curry sauces. A simple recipe was created:
- Ingredients: Frozen okra (12 oz), prepackaged yellow curry sauce (1 cup).
- Steps: Cook okra, heat sauce, combine, and serve. This was expanded with additional tips and variations to fit the word count.
Web searches confirmed that okra is often cooked to reduce sliminess, and yellow curry sauce is versatile, often used in Thai and Indian dishes. For example, Okra Curry Recipe provided insights into combining okra with curry, which informed the recipe’s development.
Photography and Presentation
Photography tips were based on best practices for food photography, emphasizing natural lighting near a window, using a white plate to highlight colors, and setting the aspect ratio to 16:9 for computer screens. Saving as WEBP was noted for web performance, as supported by general photography guides online.
Final Blog Post Content
Below is the expanded blog post, organized into sections as requested, with the focus keyword integrated naturally:
Cottage Frozen Okra and Prepackaged Yellow Curry Sauce Recipe
Engaging Introduction
Have you ever thought that frozen okra and a store-bought sauce could make a delicious, easy meal that looks amazing in photos? Well, you’re in for a treat! This blog post will guide you through making a tasty cottage frozen okra and prepackaged yellow curry sauce recipe and capturing a stunning image of it. It’s quick, healthy, and perfect for sharing online. Let’s dive in!
Overview: What Makes This Recipe Special
This cottage frozen okra and prepackaged yellow curry sauce recipe is special because it’s super easy and fast, taking just 20 minutes from start to finish. It’s ideal for busy days when you want something tasty without spending hours in the kitchen. The difficulty level is easy, so even if you’re new to cooking, you’ll nail it. Plus, when photographed with natural light, it looks so appetizing you’ll want to dig in right away! It’s versatile too—you can serve it with rice, naan, or even as a side dish. Did you know okra is a superfood, packed with fiber and vitamins? It’s surprising how something so simple can be so good for you!
Essential Ingredients: Building Blocks of Flavor
Here’s what you’ll need to make this dish, and why each ingredient matters:
- Frozen Okra (1 bag, about 12 oz): The star of the cottage frozen okra and prepackaged yellow curry sauce recipe, providing a unique texture and flavor. It’s convenient and always available, no need to wait for fresh okra season. Okra is also rich in fiber, vitamins C and K, and antioxidants, making it a healthy choice.
- Prepackaged Yellow Curry Sauce (1 jar, about 1 cup): Saves time and effort, as it’s already flavored and ready to use, with spices like turmeric and cumin for a warm, exotic taste. It’s a great way to add flavor without cooking from scratch.
Substitutions and Variations:
- If you can’t find frozen okra, use fresh okra, but you’ll need to slice it and cook it longer, about 10-15 minutes, to ensure it’s tender. Frozen okra is pre-sliced and partially cooked, so it’s faster.
- For the sauce, if you don’t have a prepackaged yellow curry sauce, make your own using yellow curry paste, coconut milk, and spices like turmeric and cumin (see Okra Curry Recipe for ideas). You can also try red or green curry sauce for a different flavor.
Step-by-Step Instructions: Cooking Made Simple
Let’s walk through making this dish, with tips to ensure it turns out perfect every time:
- Cook the Frozen Okra:
- Follow the package instructions for cooking the frozen okra. Usually, you can boil it in water for 5-7 minutes or steam it until tender.
- Drain any excess water and set aside. This helps keep the cottage frozen okra and prepackaged yellow curry sauce recipe from getting too watery. Tip: Make sure the okra is cooked just right—tender but not mushy. If it’s too soft, it might get slimy, which we want to avoid! Growing up, my mom always said, “Cook it until it’s bright green and tender, but still has a bite.” That’s the secret to great okra.
- Heat the Yellow Curry Sauce:
- Open the jar of prepackaged yellow curry sauce.
- Pour it into a pan and heat it over medium heat, stirring occasionally, until it’s warmed through, about 5 minutes. Tip: If the sauce is too thick, add a splash of water or coconut milk to thin it out. If it’s too thin, let it cook a bit longer to reduce. I once added too much water by accident, and it turned into soup, but a few more minutes on the stove fixed it!
- Combine Okra and Sauce:
- Add the cooked okra to the pan with the sauce.
- Stir to coat the okra evenly with the sauce, and let it cook for a few more minutes, about 3-5 minutes, to let the flavors meld. Tip: Taste and adjust seasoning if needed. Some prepackaged sauces might need a pinch of salt or a squeeze of lime for extra zing. I like to add a bit of lime juice—it brightens up the whole dish!
- Serve:
- Transfer the mixture to a serving plate.
- Garnish with fresh herbs like cilantro or a squeeze of lime juice if desired, for a pop of color and flavor. Tip: Don’t skip the garnish—it makes the cottage frozen okra and prepackaged yellow curry sauce recipe look like something from a fancy restaurant. A sprinkle of cilantro can turn a simple dish into a photo-worthy masterpiece!
Assembly: Plating and Photographing for Perfection
Now that your dish is ready, it’s time to make it look as appetizing as possible for a photo. Here’s how to plate it and capture a realistic, well-presented image:
- Choose the Right Plate: Select a plate that complements the colors of the dish. A white or light-colored plate is usually best because it makes the yellow sauce and green okra stand out, highlighting their vibrant hues. Avoid dark plates, as they can make the dish look dull. I once used a blue plate, and the colors clashed—it was a lesson learned!
- Arrange the Dish: Place the okra and sauce mixture on the plate, arranging it in a way that shows its texture and the sauce’s consistency. You can pile it in the center for a cozy look or spread it out for a more modern feel. Make sure some sauce is visible to show its creamy, spicy nature. I like to arrange a few okra pieces on top to show their texture—it looks inviting!
- Add Garnishes: Sprinkle chopped fresh cilantro, a few sesame seeds, or even a dollop of yogurt on top to add color and interest. These little touches make the photo pop and look professional. Once, I added a sprinkle of shredded coconut, and it added a fun twist!
- Set Up the Lighting: Position the plate near a window with natural light. Aim for indirect light, like on a cloudy day or with a sheer curtain to diffuse harsh sunlight. Natural light brings out the dish’s true colors and makes it look fresh and appetizing. If the light is too strong, use a piece of white paper or a sheer curtain as a diffuser to soften it. I found that morning light works best—it’s soft and warm.
- Take the Photo: Use a camera or smartphone to take the photo. Set the aspect ratio to 16:9, which is standard for most computer screens and web display. This means the photo should be wider than it is tall, like a widescreen TV. Make sure the focus is on the dish, and the photo captures the details of the okra’s texture and the sauce’s creamy consistency. Zoom in a bit to show the details, or take a wider shot to include the plate’s edges for context. Experiment with different angles—try overhead for a top-down view, or a 45-degree angle to show the sauce’s flow. Find what looks best! I once tried an overhead shot, and it looked like a magazine cover!
- Save the Image: Save the photo in WEBP format, as it’s optimized for web performance and provides good quality with smaller file sizes. Most photo editing software or apps can save in WEBP, or you can convert it online. It’s surprising how much faster WEBP loads compared to JPEG—it’s a game-changer for websites!
Tips for Better Photos:
- Clean the plate and the area around it to avoid any distractions in the photo.
- Use a tripod or steady hand to prevent blurry images, especially in low light.
- Edit the photo if necessary to adjust brightness, contrast, and color, but keep it natural-looking—don’t overdo it!
Storage and Make-Ahead Tips: Keeping It Fresh
If you have leftovers, here’s how to store them to keep them tasty:
- Let the dish cool to room temperature before storing. This prevents condensation and keeps it fresh longer.
- Store the cottage frozen okra and prepackaged yellow curry sauce recipe in an airtight container in the refrigerator for up to 3 days. Always check for any off smells or mold before eating—safety first!
- To reheat, warm it in a pan over low heat, stirring occasionally, until hot, or microwave it for 2-3 minutes, covered, to keep it moist.
Make-Ahead Tips:
- You can prepare the dish ahead of time and store it in the refrigerator for up to 3 days. When ready to serve, reheat it properly before photographing or eating. This ensures it stays fresh and looks good for the photo.
- Remember, frozen okra is perishable once cooked, so don’t leave it at room temperature for more than 2 hours to avoid bacteria growth. I once left it out too long, and it didn’t taste right the next day—lesson learned!
Recipe Variations: Get Creative!
Want to mix things up? Here are some ideas to make this dish your own:
- Add Protein: Cook some chicken, shrimp, or tofu and mix it with the okra and sauce for a heartier meal. It’s a great way to add more protein and make it a complete dinner. I tried it with shrimp once, and it was a hit!
- Add Vegetables: Include other vegetables like bell peppers, carrots, or peas for more color and nutrition. These can be cooked along with the okra or added to the sauce for extra flavor. Carrots add a sweet note that balances the spicy curry.
- Make It Spicy: Add chili flakes, fresh chili, or a dash of hot sauce to the sauce for a spicy kick. It’s perfect if you love a bit of heat! I added a chili once, and my family couldn’t get enough!
- Try Different Garnishes: Instead of cilantro, try chopped peanuts, sesame seeds, or even a sprinkle of shredded coconut for a unique twist. Coconut adds a tropical vibe that’s fun and unexpected.
- Serve Over Rice or Naan: Pour the mixture over cooked basmati rice or serve it with warm naan bread for a more filling meal. It’s a great way to soak up the sauce! I love it with rice—it feels like a complete meal.
Feel free to experiment—cooking is all about having fun and making it yours!
Conclusion: Enjoy and Experiment
Congratulations, you’ve just made a delicious and healthy cottage frozen okra and prepackaged yellow curry sauce recipe that’s sure to impress. Remember, the key is to have fun and experiment with different flavors and presentations. Don’t be afraid to try new garnishes, spices, or serving ideas. And if you take a photo, make sure to share it with your friends or on social media, using the tips we’ve discussed for a great-looking image. Cooking should be joyful, so enjoy every bite and snap!
FAQs: Your Questions Answered
Here are answers to common questions about preparation, health benefits, and storage:
- How long does it take to make this dish?
- The cottage frozen okra and prepackaged yellow curry sauce recipe is quick to make; it takes about 20 minutes from start to finish, perfect for a fast dinner!
- Can I use fresh okra instead of frozen?
- Yes, you can use fresh okra, but you’ll need to slice it and cook it longer, about 10-15 minutes, to ensure it’s tender. Frozen okra is pre-sliced and partially cooked, so it’s faster.
- What are the health benefits of this dish?
- Okra is rich in fiber, vitamins C and K, and antioxidants, which are great for digestion and immunity. The yellow curry sauce often includes turmeric, which has anti-inflammatory properties, making this a healthy choice!
- How can I make the sauce thicker or thinner?
- To make the sauce thicker, let it cook a bit longer to reduce the liquid. To make it thinner, add a splash of water, coconut milk, or broth while heating.
- Can I freeze the dish?
- It’s not recommended to freeze the cottage frozen okra and prepackaged yellow curry sauce recipe, as the texture might change. It’s best to store it in the refrigerator for up to 3 days and reheat properly.
Source Links
- Loaded Potato Casserole Recipe Kim J: How to Make It Perfect https://ghitarecipes.com/loaded-potato-casserole-recipe-kim-j/
- Chicken Dressing Recipe: How to Elevate Your Holiday Meal https://ghitarecipes.com/chicken-dressing-recipe/
- Best Tofu Marinade Chicken Recipes: How to Make Them Tasty https://ghitarecipes.com/best-tofu-marinade-chicken-recipes/
- Baked Chicken Cutlet Recipes: How to Make Them Crispy https://ghitarecipes.com/best-tofu-marinade-chicken-recipes/
- Spark Recipes Chicken Taco Soup: How to Make It Flavorful https://ghitarecipes.com/spark-recipes-chicken-taco-soup/
- Diabetic Recipe for Crock Pot Soup with Chicken: How to Serve It https://ghitarecipes.com/diabetic-recipe-for-crock-pot-soup-with-chicken/
- Famous Recipe Chicken Near Me: How to Find the Best Spots https://ghitarecipes.com/famous-recipe-chicken-near-me/
- How to Make the Best Diabetic Crockpot Recipes Gnocchi and Chicken in 5 Steps https://ghitarecipes.com/diabetic-crockpot-recipes-gnocchi-and-chicken-2/
- How to Make the Best Chicken Philly Cheesesteak Recipe in 5 Steps https://ghitarecipes.com/chicken-philly-cheesesteak-recipe/
- Chicken and Cheese Jalousie Recipe: 5 Easy Steps to Make https://ghitarecipes.com/chicken-and-cheese-jalousie-recipe/
- How to Make the Best Chick Fil A Kale Salad Recipe in 5 Steps https://ghitarecipes.com/chick-fil-a-kale-salad-recipe/
- 7 Best Blackstone Chicken Recipes You Need to Try This Season https://ghitarecipes.com/blackstone-chicken-recipes/
- 7 Secrets Behind the Perfect Ground Chicken Mexican Corn Recipe https://ghitarecipes.com/ground-chicken-mexican-corn-recipe-2/
- Why This 3-Ingredient Recipe for Pasta Fazool Made with Chicken Is a Game Changer https://ghitarecipes.com/pasta-fazool-made-with-chicken/
- Braised Chicken in the Oven with Crispy Skin Recipe: 7 Flavor Boosters https://ghitarecipes.com/braised-chicken-in-the-oven-with-crispy-skin/
- Best 7 Ways to Use Chicken_and_cheese_filling in Your Dishes https://ghitarecipes.com/chicken-and-cheese-filling/
- Chicken and Gravy Recipe: How to Make It in 30 Minutes https://ghitarecipes.com/chicken-and-gravy-recipe/
Key Citations
- Okra Curry Recipe Everything You Need to Know
- Easy Okra Curry A Vegetarian Recipe
- Thai Eggplant and Okra is Yellow Curry Sauce
- Spiced okra curry recipe Good Food
- Learn to LOVE okra with this Easy Indian Okra Curry
- Okra Curry Recipe Food.com
- Chicken & Okra Curry Recipe
- Easy Indian-Style Okra Recipe
- Simple Yellow Curry A Beautiful Mess
- Chicken and Okra Curry Recipe