18th Century Queen’s Cake Recipe: How to Bake It Perfectly
18th Century Queen’s Cake Recipe
Table of Contents
Introduction
Imagine the aroma of a freshly baked cake wafting through your kitchen, inviting everyone to gather around. The 18th-century queen’s cake is not just a treat; it’s a delightful experience that captivates the senses. With its rich, buttery flavor and a hint of sweetness, this cake can turn any ordinary gathering into a royal affair. Whether it’s a birthday, tea party, or a cozy family dinner, this cake will impress your guests.
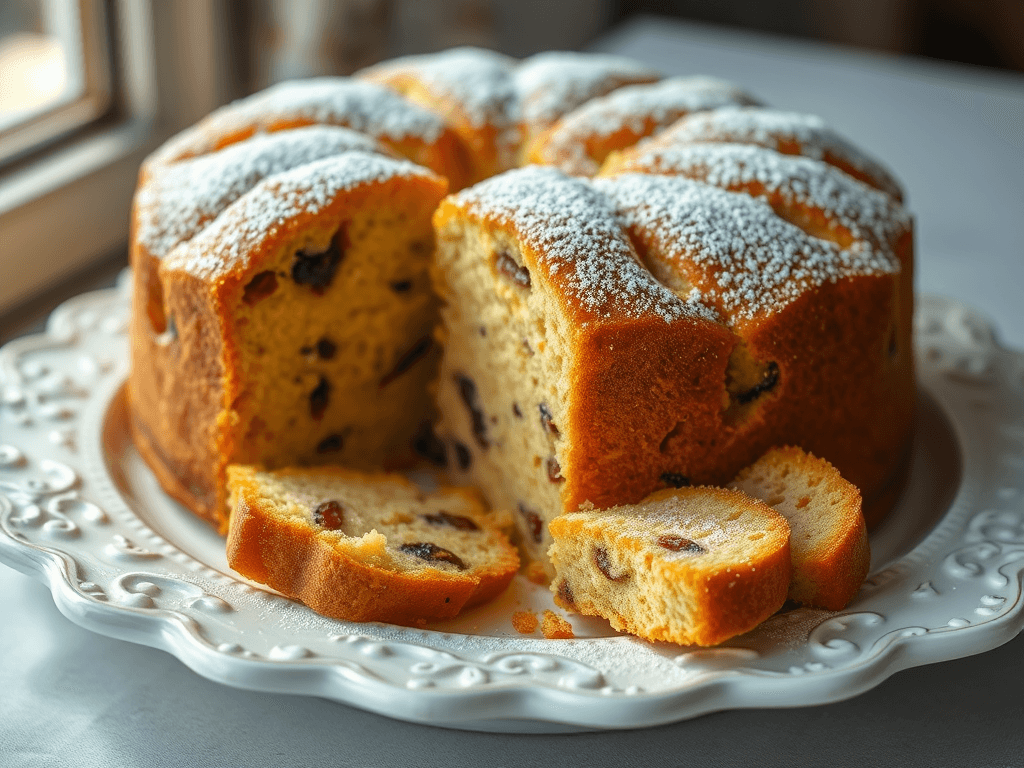
Did you know that this cake has roots dating back to the 1700s? Historical recipes often carry tales from the past, and the queen’s cake is no exception. Originally made to celebrate royal occasions, it was often adorned with luxurious ingredients like dried fruits and spices. Imagine serving a slice of history on your dessert table!
What makes the 18th-century queen’s cake special is its simplicity. You don’t need to be a culinary wizard to whip it up. In fact, with just a few ingredients and a bit of time, you can create a masterpiece that will have your friends asking for seconds. It also offers a quick preparation time, making it a perfect choice for busy bakers and families. So, why not gather your loved ones and create lasting memories over this delightful dessert?
If you’re familiar with our popular chocolate lava cake, you’ll find that the queen’s cake shares the same appeal but with a unique twist. While the lava cake is rich and indulgent, the queen’s cake offers a lighter, yet equally satisfying option. Both recipes emphasize the joy of baking and sharing delicious treats with those you love.
So, are you ready to embark on this baking adventure? Grab your apron, and let’s dive into the world of the 18th-century queen’s cake. You won’t just be making a dessert; you’ll be creating a show-stopping centerpiece that your guests will rave about!
What is 18th Century Queen’s Cake?
So, what’s in a name? The 18th-century queen’s cake might sound regal, but it’s a cake that even the most humble baker can master. Ever wondered why it’s called a “queen’s cake”? Legend has it that this dessert was fit for royalty, and often served at lavish banquets and celebrations. Isn’t it fun to think that one bite could transport you back to a time of ball gowns and powdered wigs?
And speaking of timeless sayings, remember this one: “The way to a man’s heart is through his stomach.” Well, this cake has that covered! Picture yourself serving a slice, and watch as everyone gathers around, eager for a taste. So, why not give it a go? You might just discover your new favorite recipe!
Why You’ll Love This 18th Century Queen’s Cake Recipe
There are several reasons why the 18th-century queen’s cake will quickly become a favorite in your baking repertoire.
1. The Main Highlight
At its core, this cake is a delightful blend of butter, sugar, and eggs, creating a moist and fluffy texture that melts in your mouth. The addition of fragrant spices and dried fruits elevates it to a whole new level, providing a burst of flavor with every bite. It’s like a warm hug on a plate!
2. Cost-Saving Benefits
Making the queen’s cake at home not only saves you money compared to purchasing fancy desserts from a bakery, but it also allows you to control the ingredients. You can choose high-quality components, ensuring that each bite is as delicious as it is wholesome. Plus, the satisfaction of baking from scratch is priceless!
3. Flavorful Toppings and Ingredients
What sets this cake apart are the toppings and mix-ins. Picture a dusting of powdered sugar or a drizzle of lemon glaze to enhance its sweetness. You can even experiment with different dried fruits like cranberries, raisins, or apricots. Each variation adds a personal touch and allows for creativity in the kitchen.
If you enjoy baking, you might also love our classic vanilla sponge cake. While both cakes offer a delightful sweetness, the queen’s cake brings a unique historical flair that makes it a standout choice. So why not explore the world of baking further and try both?
Are you excited to bake? Let’s get started on this delicious journey!
How to Make 18th Century Queen’s Cake Recipe: How to Bake It Perfectly
Quick Overview
The 18th-century queen’s cake is easy, delicious, and incredibly satisfying. With a preparation time of about 30 minutes and a baking time of around 45 minutes, you’ll have this delightful dessert ready to impress in no time. It’s perfect for both beginners and seasoned bakers, making it an ideal recipe for everyone.
Key Ingredients for 18th Century Queen’s Cake Recipe: How to Bake It Perfectly
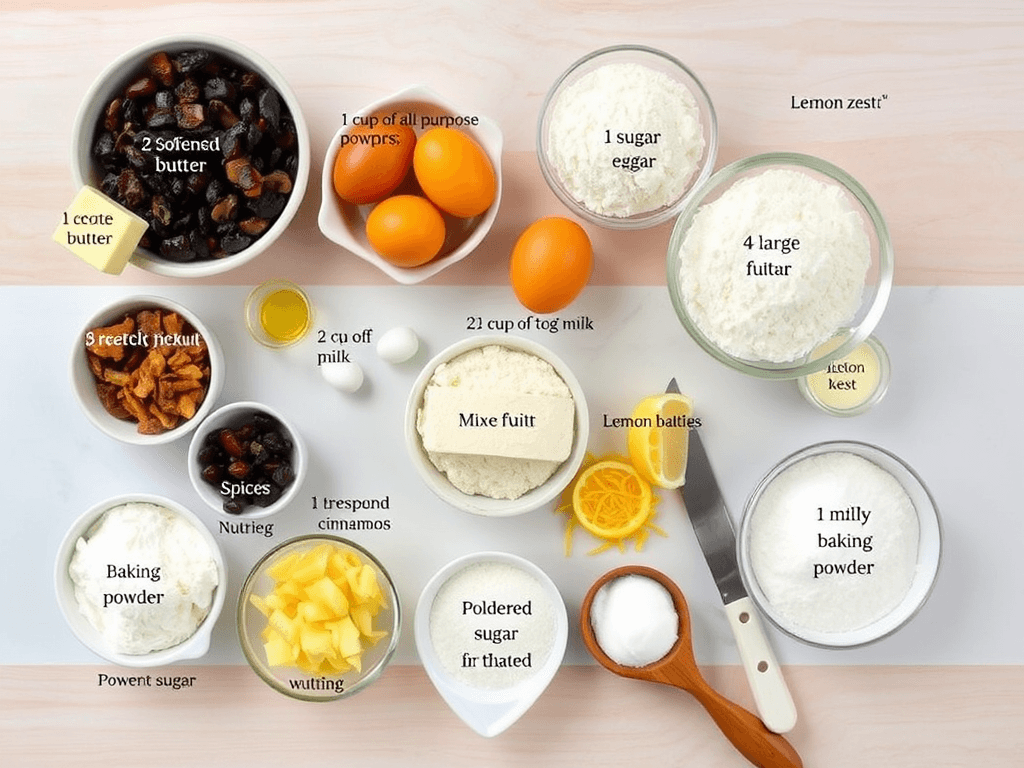
Here’s what you’ll need to create this delicious cake:
- Butter: 1 cup (softened)
- Sugar: 1 cup
- Eggs: 4 large
- Flour: 2 cups (all-purpose)
- Baking Powder: 1 teaspoon
- Milk: 1/2 cup
- Dried Fruits: 1 cup (mixed, such as raisins and currants)
- Spices: 1 teaspoon (cinnamon and nutmeg)
- Lemon Zest: 1 tablespoon
- Powdered Sugar: for dusting (optional)
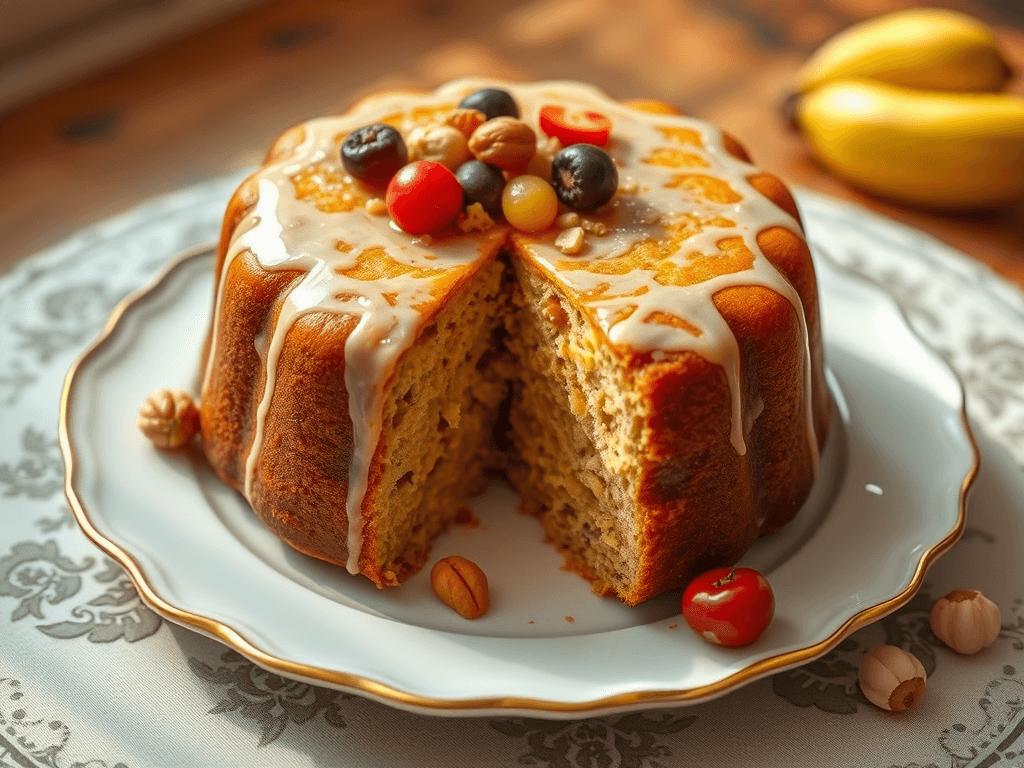
Ingredients for 18th Century Queen’s Cake
Step-by-Step Instructions
Follow these simple steps to bake the perfect 18th-century queen’s cake:
- Preheat the Oven: Start by preheating your oven to 350°F (175°C). This ensures that your cake bakes evenly and rises beautifully.
- Prepare the Pan: Grease and flour a 9-inch round cake pan. This step helps prevent the cake from sticking, ensuring a smooth release.
- Cream the Butter and Sugar: In a large mixing bowl, cream together the softened butter and sugar until light and fluffy. This process incorporates air, giving the cake a lovely texture.
- Add the Eggs: Beat in the eggs one at a time, mixing well after each addition. This will help create a rich and moist batter.
- Combine Dry Ingredients: In a separate bowl, whisk together the flour, baking powder, and spices. Gradually add this mixture to the wet ingredients, alternating with the milk. Mix until just combined.
- Fold in Dried Fruits and Lemon Zest: Gently fold in the dried fruits and lemon zest. This adds bursts of flavor throughout the cake.
- Pour batter into Pan: Transfer the batter into the prepared cake pan, smoothing the top with a spatula.
- Bake: Place the pan in the preheated oven and bake for 40-45 minutes, or until a toothpick inserted into the center comes out clean.
- Cool: Once baked, remove the cake from the oven and allow it to cool in the pan for 10 minutes before transferring it to a wire rack to cool completely.
- Serve: Dust with powdered sugar before serving, if desired. Enjoy your delicious creation!
What to Serve with 18th Century Queen’s Cake
To enhance your dining experience, consider serving the queen’s cake with complementary sides or drinks. Here are a few ideas:
- Tea or Coffee: A cup of freshly brewed tea or coffee pairs wonderfully with the cake, making it an ideal choice for afternoon gatherings.
- Fresh Berries: A side of mixed berries adds a refreshing contrast to the rich flavors of the cake.
- Whipped Cream: A dollop of whipped cream can elevate the cake’s sweetness and provide a creamy texture that contrasts nicely with the cake.
Top Tips for Perfecting 18th Century Queen’s Cake Recipe
To ensure you master the art of baking this delightful cake, here are some valuable tips:
- Ingredient Substitutions: If you don’t have dried fruits on hand, try using chocolate chips or nuts for a different twist.
- Timing Adjustments: Keep an eye on the cake during the last few minutes of baking to prevent overcooking.
- Common Mistakes to Avoid: Be careful not to overmix the batter after adding the flour, as this can result in a dense cake.
Storing and Reheating Tips
After enjoying your queen’s cake, you may want to store leftovers. Here’s how to do it:
- Refrigeration: The cake can be stored in an airtight container in the refrigerator for up to 5 days.
- Freezing: For longer storage, wrap the cooled cake tightly in plastic wrap and then aluminum foil. It can be frozen for up to 3 months.
- Reheating: To enjoy the cake warm, simply defrost it in the refrigerator overnight, then reheat the slices in the microwave for about 15-20 seconds.
By following these tips, you can savor every last bite of your 18th-century queen’s cake!
Ready to impress your guests? Let’s get baking! This delightful recipe is waiting for you to bring a touch of history and a lot of flavor to your kitchen. Enjoy!
Source Links
- Loaded Potato Casserole Recipe Kim J: How to Make It Perfect https://ghitarecipes.com/loaded-potato-casserole-recipe-kim-j/
- Chicken Dressing Recipe: How to Elevate Your Holiday Meal https://ghitarecipes.com/chicken-dressing-recipe/
- Best Tofu Marinade Chicken Recipes: How to Make Them Tasty https://ghitarecipes.com/best-tofu-marinade-chicken-recipes/
- Baked Chicken Cutlet Recipes: How to Make Them Crispy https://ghitarecipes.com/best-tofu-marinade-chicken-recipes/
- Spark Recipes Chicken Taco Soup: How to Make It Flavorful https://ghitarecipes.com/spark-recipes-chicken-taco-soup/
- Diabetic Recipe for Crock Pot Soup with Chicken: How to Serve It https://ghitarecipes.com/diabetic-recipe-for-crock-pot-soup-with-chicken/
- Famous Recipe Chicken Near Me: How to Find the Best Spots https://ghitarecipes.com/famous-recipe-chicken-near-me/
- How to Make the Best Diabetic Crockpot Recipes Gnocchi and Chicken in 5 Steps https://ghitarecipes.com/diabetic-crockpot-recipes-gnocchi-and-chicken-2/
- How to Make the Best Chicken Philly Cheesesteak Recipe in 5 Steps https://ghitarecipes.com/chicken-philly-cheesesteak-recipe/
- Chicken and Cheese Jalousie Recipe: 5 Easy Steps to Make https://ghitarecipes.com/chicken-and-cheese-jalousie-recipe/
- How to Make the Best Chick Fil A Kale Salad Recipe in 5 Steps https://ghitarecipes.com/chick-fil-a-kale-salad-recipe/
- 7 Best Blackstone Chicken Recipes You Need to Try This Season https://ghitarecipes.com/blackstone-chicken-recipes/
- 7 Secrets Behind the Perfect Ground Chicken Mexican Corn Recipe https://ghitarecipes.com/ground-chicken-mexican-corn-recipe-2/
- Why This 3-Ingredient Recipe for Pasta Fazool Made with Chicken Is a Game Changer https://ghitarecipes.com/pasta-fazool-made-with-chicken/
- Braised Chicken in the Oven with Crispy Skin Recipe: 7 Flavor Boosters https://ghitarecipes.com/braised-chicken-in-the-oven-with-crispy-skin/
- Best 7 Ways to Use Chicken_and_cheese_filling in Your Dishes https://ghitarecipes.com/chicken-and-cheese-filling/
- Chicken and Gravy Recipe: How to Make It in 30 Minutes https://ghitarecipes.com/chicken-and-gravy-recipe/